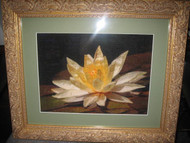
How to Frame Cross Stitch Projects | Glass or No Glass?
Posted by Tracey M. Kramer on 28th Mar 2015

HOW TO FRAME CROSS STITCH?
How to Frame Cross Stitch Projects? A common question that I receive and often asked across the web. For finished projects, to cover with glass or not to cover with glass–that is the question. When I've finished a project, I have often wondered which choice I should make when it comes to framing my finished projects. There are two schools of thought on this subject.
GLASS OR NO GLASS?
During the framing process, you have the choice of either to cover your work with glass or to leave it out. The benefits of covering with glass are that your work will be fully protected against dirt, oils from your hands, smudges, smoke, and those viewing your work when it’s hung on a wall will not be able to get their grubby little paws on it. If you use ordinary glass (which by the way has a green tint to it), the view is clear with little distortion, but you run the risk of having your work seen with a greenish tint, especially when it’s in front of light colors. Also, if it is near any type of light, you will notice a glare instead of your finished work in all its glory.
GLASS ALTERNATIVES
However, there is an alternative glass available which is called “non-glare” glass which tackles this problem. With non-glare glass you will notice it is not as shiny as ordinary glass, but if you plan to display your work where there is any type of light, you will not have any glare, but unfortunately this type of glass will cause your framed work to look fuzzy or blurry. Some people have used acrylic (which is not glass) because it is light weight and shatter proof in case your project accidentally hits the floor. But the downside to that is that it is softer than glass and will scratch easily. By far, the best choice to make if you go the glass route is to use ultra-clear glass. It is more expensive, but there is no greenish tint and your work will be fully protected.
PROPER CARE OF YOUR FRAMED CROSS STITCH PROJECT
Another benefit with using glass is that it makes your displayed work easier to clean. If you do try to clean your framed work with glass cleaner, DO NOT spray the glass area because you will run the risk of getting your stitching behind the glass wet which will create condensation. Simply dampen your cleaning rag with glass cleaner and then wipe the glass surface.
NO GLASS, THE “HANDS ON EXPERIENCE”
The other framing alternative is to simply have your finished work framed without glass, unless it’s displayed in the kitchen. Those from this school of thought believe in the “hands on” experience and welcome others to come up and touch the rich textures often created by stitching. However, when you allow this to happen, you expose your finished work to dirt, yellowing from smoke, sweat, dust, and manipulation of the stitches which can ruin all of the hard work you’ve put into your project.
PERSONAL PREFERENCES
For the most part, I have opted for using Option #1 and have always enclosed my cross stitch works in glass. However, I have made a few exceptions depending on: (1) location (where I want to place my finished work), (2) the size of the project, and (3) the type of stitching. For instance, small pieces I have stitched in needlepoint have been framed without glass. If the work is small and it is going to be placed on the wall in an area where others will not be able to reach up and touch it (like the wall behind my bed), then going glassless is acceptable; however, you will need to keep up with dusting it or dabbing it with a damp cloth to keep the dust from collecting on it.
Whatever framing method you choose, you may want to play it safe and make sure you use matting or a spacer to act as a barrier between your stitching and the glass to prevent condensation from building up on the inside. Happy Framing!

