How to Frame Cross Stitch: Glass or No Glass?
Posted by Tracey M. Kramer on 28th Mar 2015
A Note from Tracey Kramer
I've finished hundreds of pieces over the past 30 years, and the framing question never gets old — every project makes me think it through all over again. Here's everything I've learned, including the lessons I learned the hard way.

Finished lotus cross stitch pattern with framing supplies on rustic wood surface in warm light
By Tracey Kramer • • 12 min read
If there's one question I get more than almost any other, it's this: how do you actually frame a finished cross stitch project? And right behind that comes the follow-up — do you use glass or not? I've been stitching since the early 1990s, and I still think through that decision every single time I finish a piece. It is never quite the same answer twice, because the answer depends on the project, where it's going to live, and who's going to be looking at it.
A few years back I finished a piece I'm genuinely proud of — Lovely Lotus Flower, FL-37, one of my own designs from Sunrays Creations. It's a large, lush botanical with rich jewel-toned threads that took real dedication to complete. When I finally set down my needle, I sat with it for a while before deciding exactly how to frame it. That decision-making process is exactly what I want to walk you through today, because it's the same one you should be walking through for your own finished work.
Whether you've just completed your very first 5x7 sampler or you're staring at a 16-inch heirloom piece wondering what in the world to do next, this guide is for you. I'm going to cover the glass debate honestly, give you the full rundown on DIY framing materials so you can do this yourself without paying Hobby Lobby prices, and share exactly what I chose for my Lotus and why. Let's get into it.
Lovely Lotus Flower, FL-37 — The Piece That Prompted This Guide
Lovely Lotus Flower, FL-37 is a counted cross stitch pattern I designed myself here at Sunrays Creations, and it is one of my personal favorites from the botanical collection. The design features a single, beautifully centered lotus bloom with layered petals in soft pinks and deep jewel tones, surrounded by elegant foliage. It stitches up on 28-count evenweave and has that kind of quiet, meditative quality that makes a long project feel like a retreat rather than a chore.
When I finished stitching it, I knew immediately it needed to be properly framed and displayed — not tucked in a drawer, not left rolled up in a tube. This piece deserved to be seen. So I went through every framing decision I'm about to describe to you, and I ended up mounting it with acid-free mat board (find on Amazon), using ultra-clear museum glass, and hanging it in a spot with indirect natural light where it absolutely glows. I'm telling you, after all those hours of stitching, doing the framing right makes all the difference.
If you've been looking for a project worthy of a real framing investment — something with enough visual depth and color complexity to justify the effort — Lovely Lotus Flower, FL-37 is exactly that. You can find the pattern on the Sunrays Creations website at https://www.sunrayscreations.com/flower-cross-stitch-pattern-lovely-lotus-flower/ for $25.00. The product image shows exactly what the finished piece looks like, and I promise it photographs even more beautifully in person once it's behind good glass. Now — let's talk about how to get your own finished work looking that good on your wall.
The Glass Debate: Two Schools of Thought
When it comes to framing a finished cross stitch project, you have two camps: glass and no glass. Both have real merits and real drawbacks, and I've tried both over the decades. The short version is this — glass protects your work, and no glass lets people experience the texture. But there's a lot more nuance than that, and where you land depends on your priorities.
The case for glass is primarily about preservation. Cross stitch is a textile — it's fabric and fiber, and fabric is vulnerable. Smoke yellows it. Dust settles into the stitches and becomes almost impossible to remove without damaging the threads. Humidity causes the fabric to pucker and warp. Sunlight fades even the most colorfast threads over years of exposure. And then there are the hands. You know the ones — a well-meaning visitor who reaches out to 'feel the texture' and leaves behind oils, lotion residue, or worse. Glass creates a barrier against all of it. For a large, labor-intensive piece like my Lovely Lotus Flower, there was never any question in my mind. It was going behind glass.
The case for no glass is a sensory one. Some stitchers — particularly those who work in needlepoint or highly textured canvaswork — feel that the whole point of the handmade object is the tactile richness of it. When you put glass in front of a piece with that kind of dimensional quality, you flatten it visually. You lose some of the depth that makes hand-stitching so different from a printed poster. I've framed a few small needlepoint pieces without glass for exactly this reason, and in the right setting — say, a small hallway piece hung well above reach — it works beautifully. But you have to be disciplined about dusting it regularly and keeping it out of the kitchen and bathroom entirely.
My personal rule after 30 years: glass for anything large, anything with significant hours invested, anything going into a high-traffic room, and anything with light-colored backgrounds. No glass only for small pieces in low-traffic locations where I know I can monitor and maintain them. And never, ever no glass in the kitchen. Grease and smoke are relentless, and they will ruin your work before you even notice it happening.
Tracey Recommends
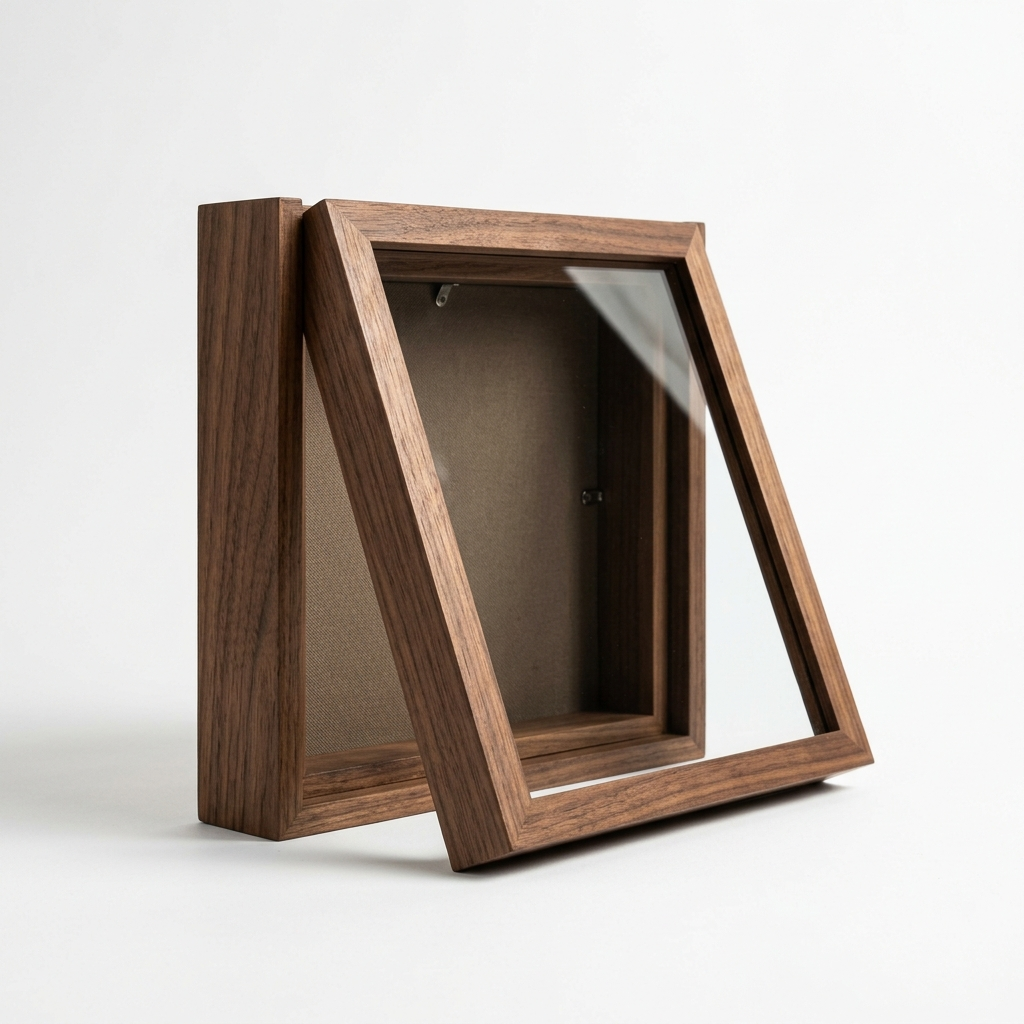
Deep Shadow Box Frame for Cross Stitch & Needlework
Standard picture frames aren't built for needlework thickness. A deep shadow box frame gives your mounted piece, mat, and glass the room they need — no bowing, no pressing, no glass touching your stitching.
See on AmazonThe stitching is the heart of it, but the framing is how you present it to the world. Take it seriously, use good materials, and your finished piece will still be beautiful in 20 years.
Choosing the Right Glass: Ordinary, Non-Glare, Ultra-Clear, and Acrylic
Not all glass is created equal, and this is one of those places where spending a little more makes a visible difference — literally. Let me walk you through your options so you can make an informed choice rather than just grabbing whatever the frame kit came with.
Ordinary picture frame glass is what you'll find in most off-the-shelf frames at big box craft stores. It works, and it's affordable, but it has two problems. First, it has a faint green tint caused by the iron content in the glass. You may not notice it at first, but hold it up in front of a light-colored piece and you'll see it immediately. Second, it creates glare. Display that frame anywhere near a window or a lamp and you'll spend more time seeing the reflection of the room than you will seeing your stitching. For something you worked 200 hours on, that's a real disappointment.
Non-glare glass sounds like the perfect solution to the glare problem, and it does solve that — no shine, no mirror effect. But it introduces a different issue: fuzziness. Non-glare glass has a matte or etched surface that scatters light, and that same surface causes whatever is behind it to look slightly blurred. The closer the glass is to your stitching, the worse the effect. If you choose non-glare glass, it matters even more that you use a mat and proper spacers to keep the glass away from the fabric.
Ultra-clear glass — sometimes called museum glass or conservation glass — is the gold standard, and it's what I used for my Lovely Lotus Flower. It has almost no tint, dramatically reduced glare compared to ordinary glass, and crystal-clear optics that let your finished piece look exactly the way you stitched it. Ultra-clear glass is more expensive, sometimes significantly so, but when you've put real hours into a piece, it's the right investment. It also frequently comes with UV protection built in, which slows fading from light exposure over time. You can find ultra-clear glass (find on Amazon) options when purchasing from specialty framing suppliers or framers who work with conservation materials.
Acrylic or plexiglass is worth mentioning separately because it genuinely solves one problem beautifully — it's shatterproof. If your frame falls off the wall (and it happens), glass means picking shards out of your stitching. Acrylic means you pick up the panel and keep going. It's also dramatically lighter than glass, which matters for large pieces on drywall anchors. The downside is that acrylic scratches very easily, it builds up static electricity that can attract dust and lint, and it doesn't have the same optical clarity as good glass. I've used it for pieces going to homes with small children, and I'd use it again for that situation. Just handle it carefully during installation.
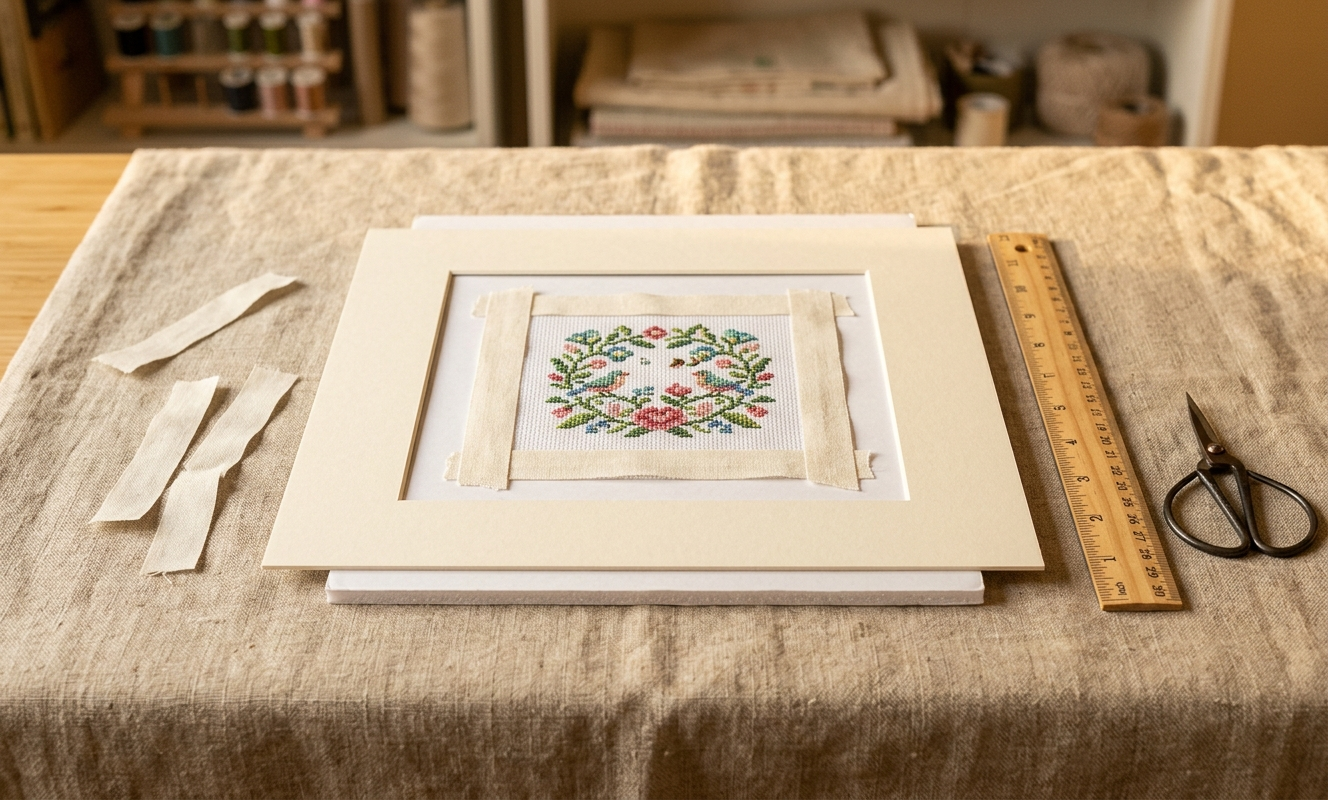
Cross stitch needlework being mounted onto foam core with acid-free mat board and linen tape
DIY Framing at Home: Every Material You Need
Here's the part most framing guides skip over: you can absolutely do this yourself. A custom framer will charge you $100, $200, sometimes more for a large needlework piece. A lot of that cost is legitimate — matting, labor, conservation materials. But if you're willing to spend a little time learning the process, you can achieve a professional result at home for a fraction of the price. Let me walk you through every material you need, in the order you'll use it.
Start with the right frame. This sounds obvious, but standard picture frames are not designed for needlework. Cross stitch on even a medium-count evenweave has thickness — once it's mounted on a backing board, you're looking at a piece that's thicker than a photograph or a print. You need a deep shadow box picture frame or a frame with a deep rabbet (that's the groove inside the frame that holds everything together). Look specifically for frames marketed toward needlework, shadowbox work, or stretched canvas — these will have the interior depth to accommodate your mounted piece plus your mat plus your glass without the whole sandwich pressing against the front. A shallow frame will cause your stitching to bow forward into the glass, which is both unattractive and a cause of condensation problems.
Next comes your glass or acrylic panel, which we just covered in the previous section. Measure your frame opening precisely before ordering, and if you're cutting glass yourself, invest in a proper glass cutter. More practically for most home stitchers: order pre-cut glass from a hardware store or framing supplier to your exact dimensions. Bring your frame with you if you can — they can measure the rabbet and cut to fit.
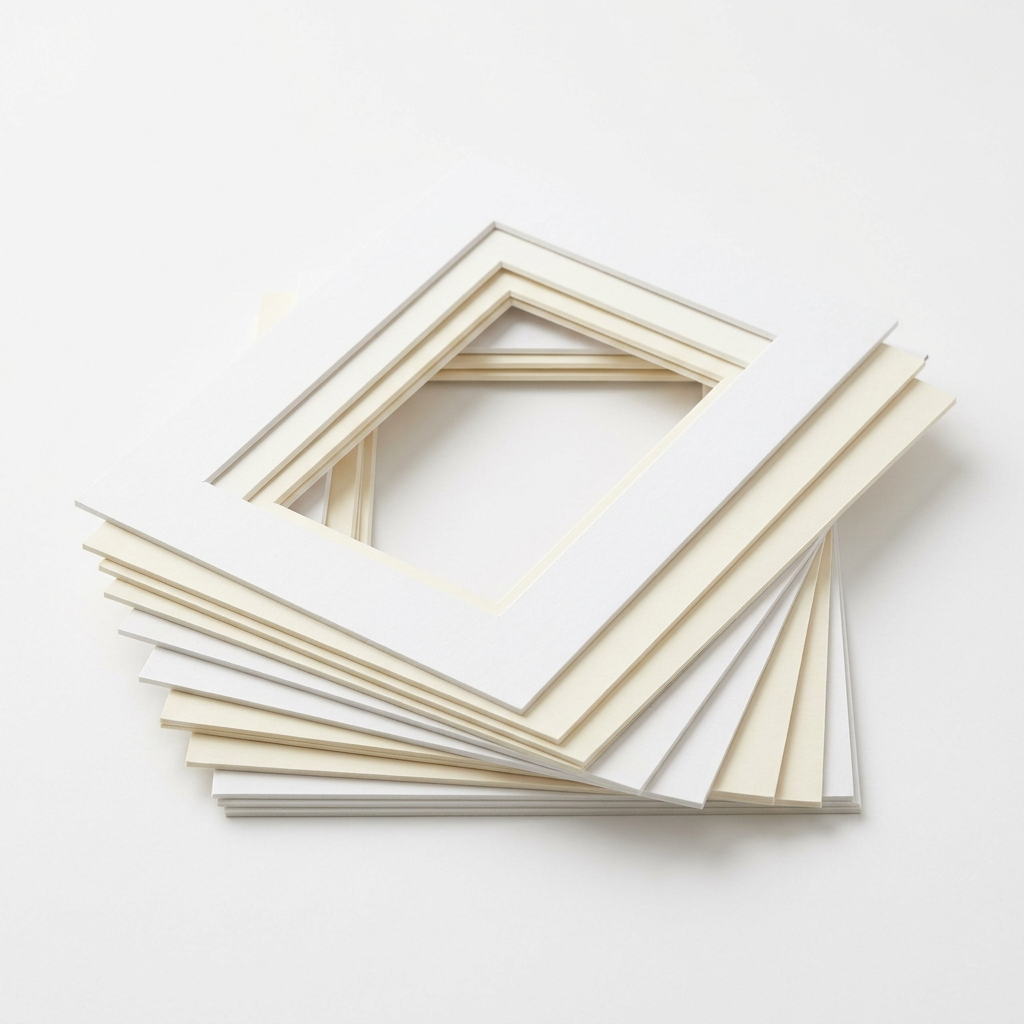
Acid-free mat board is not optional — it's essential for anything you intend to keep long-term. Standard cardboard and cheap matboard contain acids that migrate into fabric and paper over time, causing yellowing and deterioration. Acid-free mat board stops that process. It also serves as the visual border between your stitching and the frame, and a well-chosen mat color can make your finished piece look dramatically more polished. For my Lotus piece, I chose a warm cream mat that echoed the background of the fabric, and it made the whole composition feel intentional rather than slapped together. Pre-cut mat board kits are a practical option if you don't own a mat cutter.
Spacers are the unsung heroes of cross stitch framing. A spacer is a strip of material — often plastic, foam, or even thick mat board strips — that sits between the glass and your stitching to create an air gap. This gap prevents condensation from building up on the inside of the glass, which can permanently damage the threads and fabric. Without a spacer, on a humid day or in a room with temperature fluctuations, you can develop moisture between the glass and the stitching, and when that dries, you may find water stains or flattened threads. Use spacers. Every time. This is one of those things I didn't do in my early framing days and I learned the hard way.
For mounting your finished piece to the backing board, you have two main approaches. Linen mounting tape is an acid-free, water-activated tape that is specifically designed for mounting textiles. You fold the edges of your fabric over a piece of foam core backing board (find on Amazon) and secure them with the tape on the reverse side. It holds firmly, it's reversible if you ever need to reframe, and it won't discolor your fabric over time. The alternative — and the one I prefer for larger pieces — is lacing. You fold your stitching over the foam core backing board and literally lace the edges together with a long needle and strong thread on the back, creating even tension across the whole piece. It takes more time, but it's gentle on the fabric and completely removable. Finally, make sure your backing board is foam core — not cardboard, not chipboard. Foam core is acid-free, lightweight, and rigid enough to keep your mounted piece flat over years of display.
Last but not least: hanging hardware. Don't skim on this. A large framed piece needs proper D-rings or sawtooth hangers rated for the weight of your finished frame, and it needs wall anchors appropriate for your wall type. I use two D-rings and a picture wire on anything over 11x14, and I always use drywall anchors rather than hoping I'll hit a stud. There is nothing more heartbreaking than watching a framed piece drop off the wall. I've seen it happen, and the glass breaking inside the frame is as bad as it sounds.
|
Patterns from the Sunrays Collection Tracey's Picks, designing cross stitch patterns since 2004 |
|||||
|
|||||
| Browse the full Sunrays collection → |

Caring for Framed Cross Stitch: Cleaning, Humidity, and Light
Once your piece is framed and hung, the work isn't completely done. A little ongoing attention keeps your stitching looking beautiful for decades. The biggest threats to framed needlework are light, humidity, and improper cleaning — and all three are manageable with some simple habits.
Light fading is a slow and invisible process until suddenly it isn't. You won't notice the colors dimming week by week, but check a piece after five years of direct sunlight exposure and you'll see it clearly. Hang your framed cross stitch away from direct sunlight whenever possible. Indirect natural light is beautiful and relatively low-risk. If you're using conservation glass with UV filtering, you have additional protection, but it's not a substitute for common sense about placement.
Humidity is the sneakier enemy. Fabric expands and contracts with changes in humidity, and over time this can cause the mounting to loosen, the fabric to wrinkle, or in worst cases, mold to develop if moisture gets trapped behind the glass. Keep framed pieces out of bathrooms, away from exterior walls in climates with cold winters, and out of any room that regularly steams up. A consistent indoor environment — normal home temperature and humidity — is what needlework likes best.
Cleaning glass frames is something a lot of stitchers get wrong, and it's worth saying plainly: do not spray glass cleaner directly onto the glass surface of a framed piece. Spray cleaners mist, and some of that mist will find its way around the edges of the glass and land on your stitching. Moisture on threads and fabric is bad, full stop. Instead, dampen your cleaning cloth with glass cleaner away from the frame, then wipe the glass surface gently. If you're dusting a piece that's hung without glass, use a soft, clean brush — a clean pastry brush works beautifully for this — to gently flick dust out of the stitches rather than pushing it deeper in.
Get Stitching Tips & New Patterns from Tracey
Honest advice, new Sunrays designs, and occasional VIP-only offers. No fluff.
No spam. Unsubscribe any time.
Tracey Recommends
Pre-Cut Acid-Free Mat Board Kit for Needlework Framing
Acid-free mat board is non-negotiable for long-term textile preservation. A pre-cut kit saves time and gives you a polished, professional border around your finished cross stitch without needing a mat cutter.
See on AmazonMaking the Final Call: Tracey's Personal Framing Philosophy
After 30 years of finishing and framing projects, here is where I've landed: I protect my work. Not because I'm precious about it — I stitch to share these pieces, to hang them, to live with them — but because the hours that went into each one deserve to be honored with good stewardship. Cross stitch is not a disposable craft. When you hand-stitch something, you're creating something that could outlast you if you take care of it. I think about that.
My Lovely Lotus Flower hangs in a spot where it gets beautiful indirect morning light, and every time I walk past it I'm glad I took the time to do the framing right. Ultra-clear glass, acid-free mat in warm cream, foam core backing with laced edges, proper spacers, and a deep frame that gives the piece room to breathe. Total cost doing it myself: a fraction of what a custom framer would have charged. Total satisfaction: enormous.
My advice is to think of the frame not as an afterthought — not as the thing you do after the real work is done — but as the final act of the project. The stitching is the heart of it, but the framing is how you present it to the world. Take it seriously, use good materials, and your finished piece will still be beautiful in 20 years. Cheap out on the frame and the mat and the glass, and five years from now you'll be wishing you'd done it differently.
Whatever you choose — glass or no glass, DIY or professional framer, shadow box or simple frame — make the choice intentionally. Think about where it's going, who will see it, how much you'll be able to maintain it, and how many hours you put into stitching it. Those hours matter. God gave you the creativity and the patience to make something beautiful. Give it a proper home.
And if you're still searching for a project worthy of your best framing effort, browse the Sunrays Creations shop. I design every pattern myself, by hand, and I stitch them too — so what you see is what you get. Whether it's botanicals, animals, holidays, or Victorian portraits, there's something in the collection that will end up on your wall and stay there for years.
Framing your finished cross stitch is one of the most satisfying moments in this craft — you've earned it, and doing it right makes your work look exactly as good as it deserves to. If you're looking for a project worthy of that investment, head over to the Sunrays Creations shop and browse the full collection of hand-charted original patterns. Something in there is going to be your next favorite piece on the wall.

Framed botanical lotus cross stitch hanging on white wall beside dried flowers in warm room
Keep Reading
What Do You Need to Cross Stitch?
If you're still gathering your supplies before you even get to the framing stage, start here — Tracey's complete beginner supply list covers everything from fabric to frames.
READ THE GUIDECross Stitch FAQs
Got questions beyond framing? Tracey answers the most common cross stitch questions in one place — technique, materials, troubleshooting, and more.
READ THE ARTICLEWhy Buy From Sunrays Creations?
Every pattern in the Sunrays shop is hand-charted and test-stitched by Tracey herself. Here's what makes these patterns different from anything you'll find in a big-box store.
READ THE ARTICLEFrequently Asked Questions
Should I use glass when framing cross stitch?
Glass protects your stitching from dust, oils, smoke, and humidity — for large or labor-intensive pieces, it's almost always the right call. See the glass debate section above for the full breakdown.
What is the best type of glass for framing needlework?
Ultra-clear museum glass is the best option — no green tint, minimal glare, and often UV-protective. The glass options section covers all four types in detail.
Can I use acrylic instead of glass for cross stitch framing?
Yes — acrylic is shatterproof and lighter than glass, making it a practical choice for homes with children. It does scratch easily and attracts static, so handle it carefully.
Do I need a mat board when framing cross stitch?
Acid-free mat board is strongly recommended — it protects your fabric from acid migration and creates a spacer gap that prevents condensation under the glass. Details are in the DIY framing section.
How do I clean glass on a framed cross stitch piece?
Dampen your cloth with glass cleaner away from the frame, then wipe — never spray directly on the glass. Spray mist can work around the edges and wet your stitching.
Can I frame cross stitch without glass?
Yes, for small pieces in low-traffic locations. The no-glass section explains exactly when it works and when it doesn't — including why the kitchen is always a hard no.
-- Tracey Kramer
Founder & Designer, Sunrays Creations Needlearts
Hand-charted designs since 2004 • Marysville, Ohio