What Is Frogging in Cross Stitch? (And How to Do It Without Losing Your Mind)
Posted by Tracey Kramer on 30th Apr 2026
A Note from Tracey Kramer
After 22 years of designing cross stitch patterns from our Marysville studio, I've learned that the best guides come from real stitching — not theory. This is what I'd tell a friend.
")
What Is Frogging in Cross Stitch? (And How to Do It Without Losing Your Mind) | Sunrays Creations
Frogging in cross stitch means ripping out stitches you've already made because something went wrong, and the name comes from the sound of "rip-it, rip-it," just like a frog. Every stitcher frogs eventually, and after 22 years of designing patterns I can tell you it stings less when you have a method. In this guide I'll walk you through why frogging happens, how to do it without wrecking your fabric, and how to keep your sanity while you're at it.
What Frogging Actually Means in Cross Stitch
If you've spent any time on FlossTube or in a stitching group online, you've heard someone groan, "I have to frog this whole section." Frogging is the community's affectionate name for ripping out stitches. The word comes from the chant we mutter while we do it, "rip-it, rip-it," which sounds like a frog. It's gallows humor, honestly. Nobody enjoys it, but giving it a cute name takes some of the bite out.
Frogging happens when you've miscounted, used the wrong color, twisted your floss into a knot, or skipped a row and didn't notice until you were six hundred stitches deep. The result is the same. You have to remove stitches and redo that area. The good news is that frogging is a normal, ordinary part of counted cross stitch. It does not mean you're bad at the craft. It means you're paying attention.
Why is it called frogging?
The shorthand traces back to needlework forums in the early 2000s, around the same time my business was getting started. Stitchers needed a quicker way to say "I'm ripping all this out" without sounding defeated every time. "Frogging" stuck because it's playful, and the visual of a frog hopping along your fabric saying "rip-it" is the kind of thing that makes you laugh instead of cry. The community uses it constantly now, alongside other shorthand like WIP (work in progress), UFO (unfinished object), and ORT (old remaining thread, the snippets you cut off).
The Most Common Reasons Stitchers Have to Frog
I've been there more times than I can count. After designing patterns for over two decades, I still frog. Here are the situations that send most of us reaching for the tweezers.
Miscounted stitches
This is the big one. You count over ten squares on the chart, but only nine on your fabric. Three rows later you realize the whole motif is shifted. Counted cross stitch lives or dies by accuracy, which is why I always recommend gridding your fabric before you start a larger piece. A 10x10 grid in washable thread or fabric marker saves so much frogging it should be illegal not to do it.
Wrong color floss
DMC has hundreds of shades, and some of them look nearly identical under lamp light. I've grabbed 310 (black) when I meant 3799 (very dark pewter gray) more times than I want to admit. By the time you notice, you've already laid down twenty stitches in the wrong shade. That's a frog moment.
Confetti gone wrong
Confetti is what we call those little single stitches scattered across a chart, often in fine art reproductions or portraits. One wrong placement in a confetti-heavy area throws off the whole region. If you stitch confetti without parking your threads or marking finished squares, you're going to frog.
Tension and twisted floss
Two strands on 18-count Aida is my standard, and that floss needs to lie flat. If your strands twist, you get a lumpy stitch that doesn't match the smooth rows around it. Sometimes the only fix is to pull those stitches and redo them with fresh, untwisted floss.
Pattern misreads
Symbols on a chart can blur together, especially on printed patterns where similar symbols sit next to each other. A circle with a dot versus a circle without one. A backslash versus a forward slash. Misreading the symbol key for one color is a fast track to frogging.
How to Frog Without Destroying Your Fabric or Your Floss
Here's the part everyone wants to know. The technique matters because Aida cloth (find on Amazon), while sturdy, can fuzz and weaken if you yank threads out aggressively. I use 18-count Aida for all my designs, and it holds up beautifully when frogged carefully.
Method 1: The needle-flick (small areas)
For one to ten stitches, this is my go-to. Flip your hoop or frame to the back side. Slide the eye end of a tapestry needle (find on Amazon) under each stitch and gently lift it loose. Pull the floss out from the front. Don't yank. Don't snip yet. Just lift and pull. This method preserves the fabric completely and sometimes even saves the floss for reuse.
Method 2: Snip and pluck (medium areas)
For ten to fifty stitches, I switch to small embroidery scissors (find on Amazon) and tweezers. Carefully snip the stitches on the back side, never the front. Then use angled tweezers to pluck the cut floss pieces out one by one. This is where good tweezers earn their keep. Cheap ones bend and slip, and you end up frustrated.
Method 3: The seam ripper (large frog sessions)
When I have to frog an entire motif or several inches of stitching, I bring out a seam ripper. Use it only on the back of the fabric, and only on individual stitches at a time. Press the point gently under one leg of the cross, slide it sideways, and let the blade catch the floss. Never drag it across multiple stitches at once. That's how holes happen.
Method 4: The tape lift (for ORT cleanup)
After any frog session, tiny floss bits stay lodged in the Aida holes. I press a piece of regular masking tape lightly over the area and lift. The fuzz comes right off. Repeat with a fresh strip until the fabric is clean. Then smooth the Aida with your fingernail to close the holes back up before you re-stitch.
")
How to Keep Your Sanity While Frogging
The technical side is only half the battle. Frogging is emotional. You watched yourself stitch those Xs. You feel them in your hands. Pulling them out feels like erasing your own work, even though it isn't. Here's what's helped me stay calm over 22 years.
Walk away first
The moment I realize I have to frog, I put the project down. I make a cup of tea. I check on the cat. I do not start ripping stitches in the heat of frustration, because that's when the scissors slip and the real damage happens. Come back to it ten minutes later with steady hands.
Frog in good light
This is non-negotiable for me. Frogging in dim light is how you cut your fabric instead of your floss. A daylight lamp (find on Amazon), a bright window, or even just moving to the kitchen table makes a measurable difference. If you've ever wondered whether your eyes are the problem, my piece on getting your cross stitch clarity back covers lighting and magnification.
Reframe it as part of the process
I've stopped thinking of frogging as failure. It's editing. Writers edit. Painters paint over. Stitchers frog. The finished piece is better because we caught the mistake. A wonky motif you didn't fix would haunt you every time you looked at the framed piece on your wall, and these designs are meant to be framed wall art that lasts decades.
Don't reuse stretched floss
If the floss you frogged looks fuzzy, twisted, or thin, throw it in your ORT jar. Cut a fresh length. Reusing tired floss leads to lumpy restitching and more frogging later. DMC is inexpensive enough that this is never the place to economize.
Mark where you stopped
Before you re-stitch, take a moment to recount your starting point. Use a fabric-safe marker or a single placeholder stitch in a contrasting color to anchor where the new stitches go. Frogging back into a mistake because you started in the wrong square again is the kind of pain we don't need to repeat.
How to Frog Less Often (Prevention Over Cure)
The best frogging session is the one you didn't have to do. After 22 years, here's what cuts my frog rate down dramatically.
Grid your fabric before you start
I cannot say this enough. Gridding turns counting from a guessing game into a checklist. Mark your Aida in 10x10 squares using a water-soluble pen or basting thread. When you stitch, you're never counting more than ten squares at a time. Mistakes get caught in the same grid square instead of cascading across the whole project.
Use a highlighter or app to track progress
Paper patterns get a highlighter. Digital PDF patterns get an app like Pattern Keeper or a marked-up tablet. Either way, mark stitches as you complete them. You'll catch skipped rows immediately.
Two strands, always, on 18-count Aida
This is the floss coverage my designs are charted for. One strand looks sparse. Three strands looks crowded and pulls the fabric. Two strands of DMC, every time. Consistent coverage means fewer "that doesn't look right" frog moments.
Stitch in good light from the start
Most of my color-mixup frogging happened under warm yellow bulbs. Switching to a daylight LED lamp at my stitching chair fixed it almost overnight. You read symbols better, you see floss colors true, and you spot mistakes while they're still small.
Take breaks on long sessions
Tired eyes miscount. Tired hands tense up and twist floss. If you've been stitching for two hours and you start making errors, that's your body telling you to stop. Mistakes made when you're tired are the ones that need the biggest frog sessions.
Tools That Make Frogging Bearable
You don't need much, but the right two or three tools make a world of difference. I keep a small zippered pouch in my stitching basket with my frog kit ready to go. Sharp embroidery scissors with fine tips. A pair of angled tweezers for plucking cut threads. A seam ripper for the bigger jobs. A small strip of masking tape for fuzz cleanup. That's it.
Investing in tools that fit your hand well matters more than buying the fanciest options. I've used the same wooden embroidery hoop and the same scissors for years. The tweezers and seam ripper are the parts of the kit I replace most often, because precision tips wear down with use.
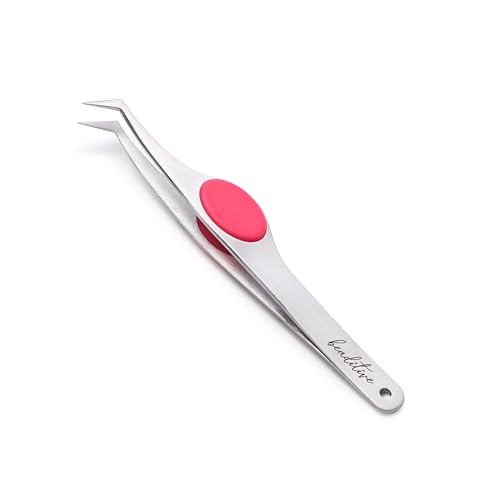
Beaditive High Precision Angled Tip TweezersThese are the angled tweezers I reach for when I need to pluck cut floss out of Aida without snagging the surrounding stitches. The fine tips grip a single strand cleanly, and the cushion grip means my hand doesn't cramp during a long frog session. Worth every penny when you're rescuing a piece you love. → Shop on Amazon |

Needle and Thread Seam Ripper for Cross StitchWhen a frog job goes beyond a few stitches, a proper seam ripper saves your fabric from the damage scissors can cause. This one has a fine point that slides under a single stitch leg cleanly, and the comfortable handle keeps you in control. Use it on the back of your work only, one stitch at a time, and your Aida stays intact. → Shop on Amazon |
From the Sunrays Pattern Library
- Chasing Butterflies, NS-01 → View Pattern
A gentle, lower-stitch-count design that's forgiving if you do need to frog a small area while you're learning. - Emerald Archway, TR-04 → View Pattern
A tree design with enough variation to practice careful counting without overwhelming confetti. - Forever Corinthian, FS-02 → View Pattern
Once you've got frogging confidence, a fantasy design like this is a satisfying step up in detail.
")
Keep Reading
Stop Squinting ! Get Your Cross Stitch Clarity Back | Sunrays CreationsGood lighting prevents most of the miscounting that leads to frogging in the first place. Read Article → |
The Parking Method in Cross Stitch. Advanced Cross Stitch TechniquesParking your floss is one of the best ways to keep confetti-heavy areas from turning into frog disasters. Read Article → |
Cross Stitch Tips for Beginners, 8 Valuable Tips on How to Get StartedIf you're new and frogging feels constant, these foundational tips will smooth out the early learning curve. Read Article → |
Frequently Asked Questions
What does frogging mean in cross stitch?
Frogging means ripping out stitches you've already made. The name comes from the "rip-it, rip-it" sound, which mimics a frog. It's a normal, expected part of counted cross stitch, and every stitcher does it eventually.
How do you frog cross stitch without ruining the fabric?
Work from the back of the fabric, never the front. Use a tapestry needle to lift small numbers of stitches, embroidery scissors and tweezers for medium areas, and a seam ripper for larger sections. Always cut one stitch at a time and clean up loose floss with a piece of masking tape afterward.
Can you reuse floss after frogging?
Sometimes, but not usually. If the floss looks fuzzy, twisted, or thinned, toss it in your ORT jar and cut a fresh length. Reusing tired floss leads to lumpy stitches and more frogging down the road, so a fresh piece of DMC is almost always worth it.
How do I avoid frogging in the first place?
Grid your fabric in 10x10 squares before you start, use two strands of DMC on 18-count Aida, stitch in bright daylight-style lighting, and mark off completed stitches as you go. These four habits cut my own frog rate down dramatically over the years.
Is it okay to leave a small mistake instead of frogging?
It depends on where the mistake is. A single off-color stitch in a busy area is often invisible once the piece is finished and framed. A miscounted motif that throws off symmetry usually needs to be fixed, because you'll see it every time you look at the finished wall art.
What tools do I need for frogging cross stitch?
A pair of sharp embroidery scissors with fine tips, angled tweezers for plucking cut floss, a seam ripper for larger areas, and a strip of masking tape for cleanup. That's the whole kit, and it fits in a small pouch.
Why does my Aida look fuzzy after frogging?
Cut floss leaves tiny fibers behind in the holes of the Aida. Press masking tape lightly over the area and lift to remove the fuzz, then smooth the fabric with your fingernail to close the holes back up. The cloth will look almost new and ready to re-stitch.
Join the Sunrays stitcher's circle
New patterns, seasonal promos, and Tracey's studio notes — delivered to your inbox.
About Tracey Kramer: Tracey is the lead designer and co-owner of Sunrays Creations, a counted cross stitch business she has run from Marysville, Ohio for over 22 years. Her patterns are stitched in homes around the world and finished as framed wall art. Visit sunrayscreations.com to explore her pattern library.