Cross Stitch Floss Storage: What Actually Works
Posted by Tracey Kramer on 12th Mar 2016
A Note from Tracey Kramer
I've been organizing — and reorganizing — my floss for over 22 years, and I've made every mistake in the book so you don't have to. This is the guide I wish someone had handed me when I first started.

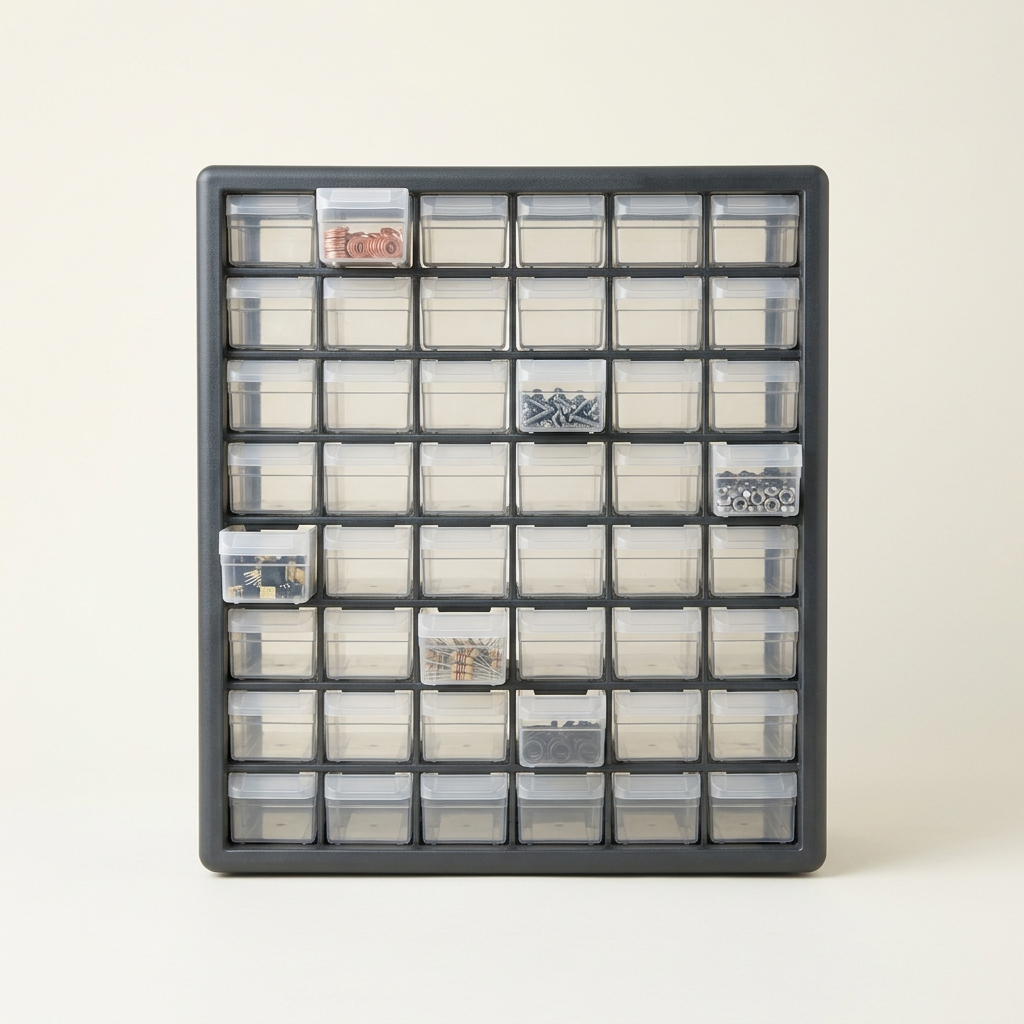
Wall-mounted 60-drawer storage cabinets filled with organized DMC embroidery floss skeins in warm craft room light
By Tracey Kramer • • 12 min read
If you've been stitching for any length of time, you already know the feeling. You sit down to work on a project, you need a specific DMC color, and somewhere between the tangled pile on your left and the overflowing basket on your right, that skein has completely vanished. Twenty minutes later you've upended your entire stash, you've found three skeins of the wrong color, and your motivation to actually stitch has quietly left the building. That right there is what bad floss storage costs you — not just time, but the joy of the craft.
I founded Sunrays Creations in 2004, and I've been stitching for well over 30 years. In that time I have tried what feels like every floss storage solution ever invented. Some of them were genuinely terrible. Some were expensive AND terrible, which is its own special kind of frustrating. And a few turned out to be exactly right — not because they looked good in a magazine, but because they actually work when you're sitting down to stitch every single day. This article is my honest account of all of it: the failures, the revelations, and the systems I still use at Sunrays Creations right now when I'm assembling kits for customers.
I've organized floss storage into two categories that I think every stitcher needs to understand: Project Storage and Stash Storage. They are not the same problem and they do not need the same solution. Once you see the distinction, a lot of the confusion around floss organization starts to clear up. Stick with me here, because by the end of this guide you'll have a real plan — not just a pretty idea.
Why Floss Storage Matters — and the Systems That Failed Me First
Let me start with the failures, because they're more instructive than any success story. When I first started building my floss collection, I went with Sudberry House floss sticks. They looked organized. They seemed practical. And for about five minutes, I felt very good about my decision. Then reality set in. The floss frayed constantly from being wound around the rough edges of the sticks. It tangled with neighboring skeins. And the biggest issue nobody warns you about — the sticks did absolutely nothing to keep the floss clean. Floss picks up dust, oils from your hands, and environmental grime faster than you'd expect. Dirty floss is not just an aesthetic problem; it affects how it stitches up in your fabric. Those floss sticks went in the trash, and good riddance.
Next up: the expensive binder system. I'm talking about the kind where you keep each skein whole and slide it into a clear vinyl slot in a ring binder. It sounds elegant in theory. In practice, getting the floss in and out of those slots was a two-handed wrestling match every single time. And worse — far worse — the pressure of being squeezed into a tight vinyl slot flattened the floss. It came out looking thin, limp, and defeated. Your floss should look plump and healthy, not smashed and defeated. When your thread loses its loft, it doesn't stitch the same way. I spent good money on that binder system and it made my floss worse. Lesson learned.
Then came the plastic bag phase. I got a pack of small zip-close bags, threaded them onto a metal ring, grabbed my Sharpie, and started labeling. I organized them by number groups — the 100s, the 200s, the 300s — and for about two weeks I felt like I had finally solved the problem. Then two things happened simultaneously, and they were both maddening. First, the Sharpie labels started wearing off the plastic bags, even though permanent markers are supposed to be, well, permanent. Second, the little DMC paper labels started slipping off the skeins inside the bags. Do you know what it's like to have six unidentified skeins of slightly-similar red sitting in the same bag with no labels? I do. It is a major pain in the patoot, and that is the politest way I can put it.
The lesson from all of these failed experiments is simple and applies to every tool in this craft: bad storage slows you down and ruins your materials. My formula — EA + O = HE, which stands for Easy Access plus Organization equals High Efficiency — isn't just a catchy phrase. It's what I learned the hard way over years of frustrating, tangled, flattened, unlabeled chaos. The right storage system protects your investment in floss, speeds up your stitching, and honestly just makes the whole experience more pleasant. So let's talk about what actually works.
Project Storage: One Box Per Project, Every Time
The first category is Project Storage, and this is where I'd tell every stitcher — beginner or experienced — to start. Project Storage is simple: it's a dedicated storage system that contains only the floss needed for one specific project. Not your whole stash. Not last month's project. Just the colors, in the quantities needed, for the piece you are actively working on right now. This distinction matters more than people realize, because mixing your project floss into your general stash is a recipe for confusion, loss, and that particular frustration of knowing you wound a bobbin of DMC 321 last Tuesday and it has now completely disappeared.
The method I landed on — and have never deviated from since — is what I call the project box. It's a small lidded storage box with interior dividers, and into it I wind all of my project floss onto DMC plastic bobbins (find on Amazon), label each one clearly with the DMC number, and arrange them in numerical order inside the box. The bobbins keep the floss clean, they keep it from tangling, and winding the floss onto a bobbin actually helps you see exactly how much of each color you have at a glance. No more pulling out a skein and realizing you've got about three inches left when you needed three feet.
For smaller projects, one box is all you need. For larger designs — particularly my Victorian portrait pieces, which can have 40 or 50 colors easily — I'll use two boxes for a single project. The boxes stack neatly, they travel well, and if I want to take my stitching to a waiting room or a friend's house, I grab the box and everything I need is right there. A small project box with dividers (find on Amazon) is honestly the single best investment a stitcher can make before anything else. You don't need a fancy system to start. You need one good box and a pack of bobbins.
One more thing on project boxes: resist the temptation to toss extra or leftover floss back into the project box after you've finished a piece. That's how the project system gets contaminated with stash inventory and stops working. Finished project? Pull the remaining floss off the bobbins, return the skeins to your stash storage, and reuse the bobbins for your next project. Keep the two categories clean and separate. It takes an extra ten minutes, and it saves you an hour of confusion down the road.
Tracey Recommends
60-Drawer Small Parts Organizer Cabinet
This is my best accidental discovery in 22 years of stitching — I spotted it in the hardware store nuts-and-bolts aisle and immediately knew it was made for DMC skeins. Each drawer fits a skein lying flat, perfectly. I use 8 of these at Sunrays Creations to cover the complete DMC range, and they're wall-mountable so your storage can go vertical. The best-kept secret in cross stitch organization, and nobody's talking about it.
See on AmazonYour floss should look plump and healthy, not smashed and defeated. Easy Access plus Organization equals High Efficiency — and that equation never fails.
Stash Storage and the 60-Drawer Discovery That Changed Everything
Stash Storage is a different animal entirely. This is where you keep your full floss inventory — everything you've accumulated that isn't assigned to a current project. If you're anything like me, that's a lot of thread. Managing a stash the size of the entire DMC range requires a system with real capacity, real organization, and ideally, something that doesn't look like a disaster waiting to happen. For a medium-sized stash, the larger flat square stackable storage boxes with lids (find on Amazon) work well — they have removable dividers so you can customize the layout, and they stack, which matters when you're dealing with hundreds of colors. I kept mine stacked on my coffee table for a good while before I had proper shelving, and honestly, it was fine.
But here's where the story gets good. One afternoon I was wandering through a hardware store — not for craft supplies, just on an errand — and I ended up in the nuts-and-bolts aisle. You know the one. Little bins of screws and nails and washers, all sorted by size. And there on the wall was a Stack-on 60-drawer small parts organizer cabinet. The kind guys use to sort out hardware. I stopped walking. I stood there staring at it for probably longer than is normal for a person in a hardware store.
The drawers were small and shallow. I pulled one open. And I realized — a DMC floss skein, laid flat, fits in that drawer almost perfectly. The depth, the width, the height — it was like those cabinets were secretly designed for embroidery floss and no one in the craft world had figured it out yet. They were also wall-mountable, which meant I could someday get them off my surfaces and onto my walls, organized like a proper library. I bought two that day, went home and started labeling the drawer fronts with large numbered stickers I printed on my own printer, and laid the skeins in flat. It worked beautifully.
Then I bought more. And more. By the time I was done, I had eight of those cabinets — eight — covering the entire DMC color range in numerical order, each drawer labeled, each skein lying flat, clean, and immediately accessible. When I'm assembling kits for Sunrays Creations customers, I walk along those cabinets and pull the exact color I need in under ten seconds. No digging. No guessing. No rogue unlabeled skeins causing confusion. Eight cabinets is the commitment level for a complete DMC range, but even two or three gets you dramatically more organized than most stitchers ever achieve. You can find the Stack-on style 60-drawer cabinets on Amazon, and I'd encourage you to search for the wall-mountable version specifically — future you will be very glad you have that option.
I still use these cabinets at Sunrays Creations today. After 22+ years of trying everything, the hardware store accident turned out to be the single best floss storage decision I ever made. Sometimes God puts you in the right aisle at the right time, and you just have to pay attention.
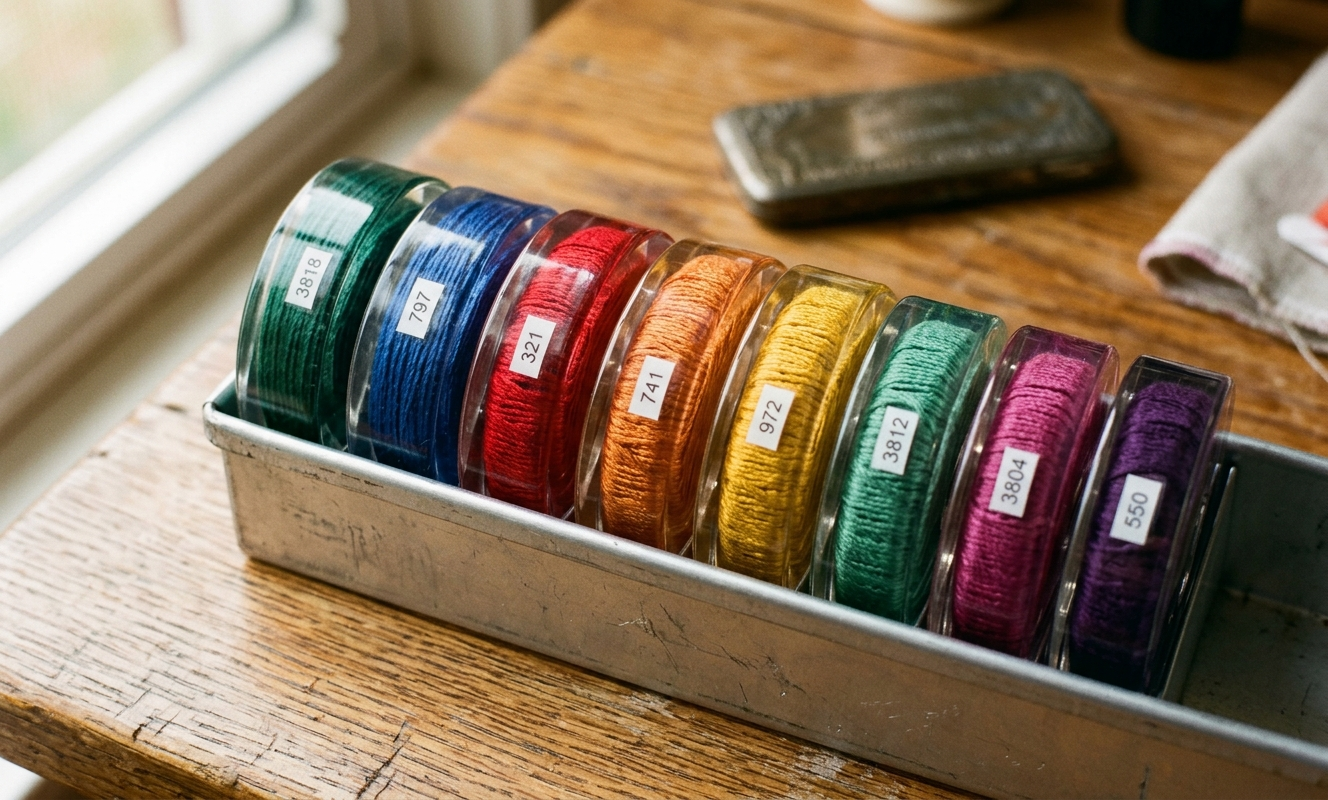
Clear acrylic embroidery floss bobbins with color swatches organized in a metal cabinet insert tray, warm light
Premium Systems for Serious Stitchers — When You Want Beautiful and Functional
If you're a more advanced stitcher with a serious stash and you want a storage system that's as beautiful as it is functional, there are a couple of premium options worth knowing about. The first is Pip and Chip, a UK-based company that makes thick acrylic bobbins specifically designed for DMC floss. What makes these different from any other bobbin on the market is that the DMC color swatch and number are embedded directly into the acrylic — no labeling required, ever. You wind your floss onto the bobbin and the color identification is already there, permanently, precisely accurate. For anyone who has spent time trying to match a bare bobbin to a DMC number, this is a revelation.
Pip and Chip sells a set of 504 bobbins to cover the complete current DMC stranded cotton range, and you can purchase them in installments, which is a sensible way to invest in a system like this without doing it all at once. These bobbins are designed to pair with a Bisley cabinet — a compact, beautiful little metal filing cabinet that comes with inserts sized to hold the Pip and Chip bobbins perfectly. The combination looks genuinely stunning in a craft room. My husband bought me the full set as a Christmas gift, and when I saw it all laid out — the colored bobbins in their trays, every shade of the DMC range at a glance — I was genuinely moved. It is snazzy. That is the only word for it.
Bisley cabinets are available on Amazon, as well as at Staples and Office Depot if you prefer to see one in person before buying. They come in several colors — matte black and light grey are popular in craft rooms — and they're built to last decades. This is not a disposable storage solution; it's an heirloom-quality piece of craft room furniture. I want to be clear that I have no affiliate arrangement with Pip and Chip, and there's no link for them here — simply search for them by name and you'll find the website. They're worth every penny.
If you want the look of premium bobbins without the full Pip and Chip investment, GWStitchingDepot makes clear acrylic bobbins that are approximately 2mm thick — almost glass-like in appearance — and sold in sets of 100. They're beautiful to look at, they keep floss clean, and they have a satisfying weight to them that cheap plastic bobbins just don't. You'll still need to label them yourself, but paired with a cardboard bobbin winder (find on Amazon) to speed up the winding process, setting up your system goes much faster than you'd expect. No shame whatsoever in wanting your storage to be beautiful — you're going to look at it every time you sit down to stitch, and it should make you happy.
|
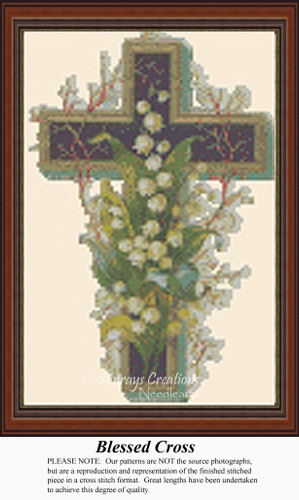
Patterns from the Sunrays Collection Tracey's Picks, designing cross stitch patterns since 2004 |
|||||
|
|||||
| Browse the full Sunrays collection → |


Label Everything — The Rule That Makes Any System Work
I want to close with something that sounds obvious but is violated constantly, even by experienced stitchers: label everything, every time, without exception. It does not matter how good your storage system is. An unlabeled drawer is just organized chaos waiting to happen. An unlabeled bobbin is a mystery skein. A mystery skein is a problem. I have encountered stitchers who had genuinely beautiful storage — lovely boxes, proper bobbins, thoughtful layouts — but half the bobbins were unmarked because they 'planned to label them later.' Later never comes. Label as you go. It takes thirty extra seconds per bobbin and it saves you from a frustration that has no good solution once it's happened.
The tool that made labeling easy for me across all eight of my storage cabinets was an electronic label maker. I use mine for the drawer fronts on the Stack-on cabinets, and it's made a world of difference compared to my early days of printing stickers on my home printer. A good label maker — the Brother P-Touch is the one I reach for — produces labels that don't fade, don't peel, and look clean and professional on drawer fronts of any size. Once you've used one you will not go back to handwriting labels on anything. It's one of those tools that costs maybe $30 and pays for itself the first afternoon you use it. You can find label makers on Amazon easily — search for the Brother P-Touch specifically and look for the craft room organizer bundles that include extra tape cartridges.
My formula hasn't changed in all the years I've been organizing floss: EA + O = HE. Easy Access plus Organization equals High Efficiency. The right storage system is simply the one you will actually use consistently — the one that fits your space, your budget, and your habits. Start simple if you need to. A project box and a pack of bobbins is a completely legitimate starting point. Upgrade as your stash grows and your investment in the craft deepens. But wherever you are right now, make it clean, make it labeled, and make it easy to reach. That's the whole secret. Everything else is just details.
Get Stitching Tips & New Patterns from Tracey
Honest advice, new Sunrays designs, and occasional VIP-only offers. No fluff.
No spam. Unsubscribe any time.
Also Recommended
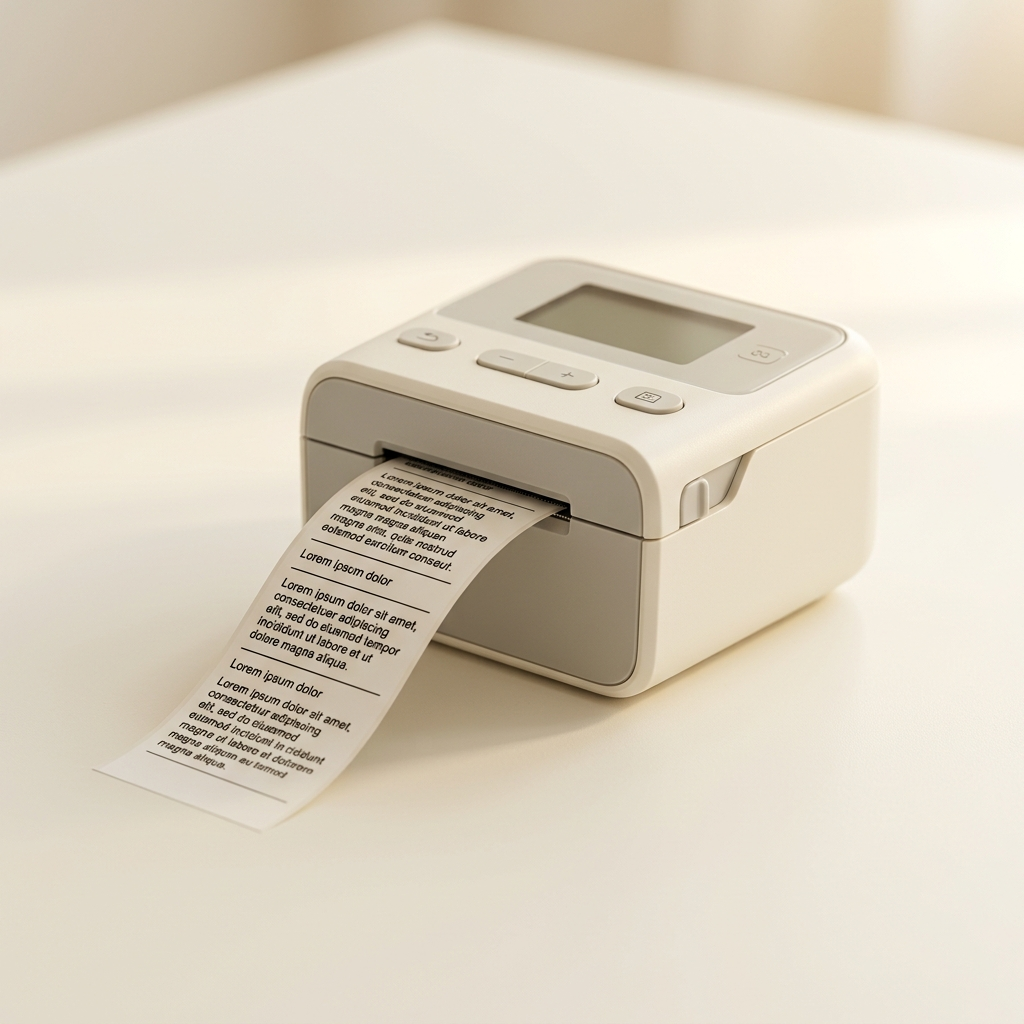
Electronic Label Maker — Brother P-Touch
The unsung hero of any storage system. Once I started using a label maker on my storage cabinet drawers, I never went back to printed stickers or handwriting. The labels are crisp, permanent, and look professional on small drawer fronts. If you're setting up a real floss organization system — whether it's a box of bobbins or eight wall-mounted cabinets — a label maker is what turns a good idea into a permanent one.
See on AmazonAfter 22 years of building Sunrays Creations and stitching through every system imaginable, the one thing I can tell you with absolute certainty is this: organized floss is stitching time protected. When your storage works, you spend your time creating, not searching. If you're ready to put that time to good use, come browse the pattern collection at Sunrays Creations — animals, botanicals, Victorian portraits, holiday designs — all hand-charted and ready to stitch the moment your bobbins are wound.
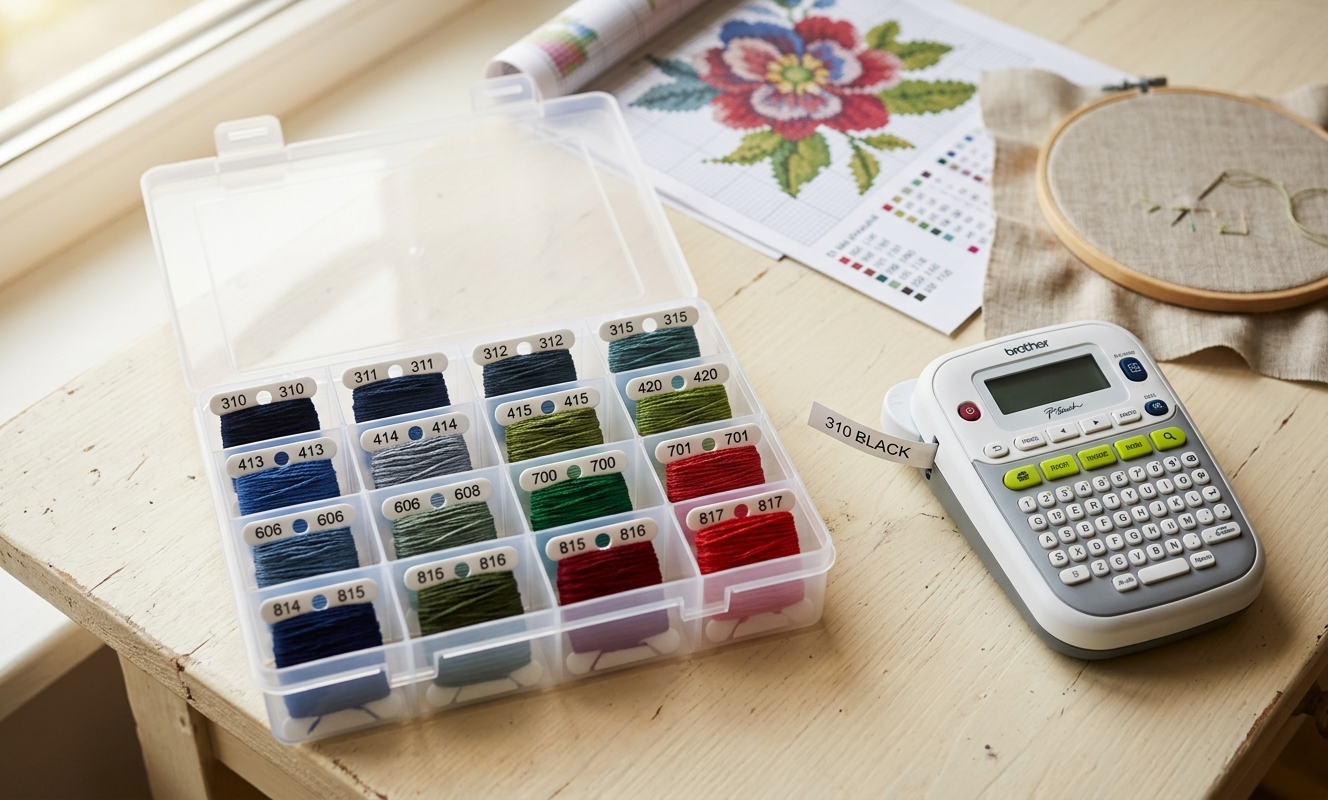
Open cross stitch project box with labeled DMC bobbins beside a label maker and stitching pattern chart
Keep Reading
Working With Satin Embroidery Floss
Got specialty threads in your stash? Satin and metallic flosses need their own storage considerations — this guide covers how to handle them without the tangle nightmare.
READ THE GUIDEKeeping Your Needlework Clean
Storage isn't just about organization — it's about protecting your floss from dust, oils, and grime. This companion article covers everything you need to know about keeping your work fresh.
READ THE ARTICLEWhat Do You Need to Cross Stitch?
Just getting started and building your first supply kit? This is the complete beginner's guide to everything you need — including how to think about floss storage from day one.
READ THE GUIDEFrequently Asked Questions
What is the best way to store cross stitch floss?
Wind floss onto labeled bobbins and store them in a lidded project box — this keeps floss clean, tangle-free, and easy to access. See the Project Storage section for the full breakdown.
How do you organize a large DMC floss collection?
Tracey uses 8 wall-mountable 60-drawer hardware cabinets to cover the entire DMC range — each drawer holds one color laid flat. The full method is in the Stash Storage section.
What are DMC plastic bobbins and how do I use them?
They're small plastic cards you wind your floss onto and label with the DMC number. They keep floss neat and organized in a project box — covered in detail in the Project Storage section.
What is the Pip and Chip bobbin system?
Pip and Chip makes thick acrylic bobbins with the DMC color swatch and number permanently embedded — no labeling needed. They pair with a Bisley cabinet for a premium storage setup. See the Premium Systems section.
Why does my floss look flat and lifeless after storage?
Squeezing floss into tight vinyl slots or overcrowded bags compresses it and kills the loft. Bobbins in a proper divider box let the floss breathe — this is explained in the Failed Systems section.
Do I need a label maker for floss storage?
Tracey strongly recommends one — handwritten and printed labels fade and peel, while label maker tape stays crisp on drawer fronts for years. The Label Everything section covers why this matters.
-- Tracey Kramer
Founder & Designer, Sunrays Creations Needlearts
Hand-charted designs since 2004 • Marysville, Ohio