How to Grid Your Cross Stitch Fabric (And Why It Changes Everything)
Posted by Tracey M. Kramer on 16th Jun 2026
A Note from Tracey Kramer
I have been designing counted cross-stitch patterns since 2004, and in that time I have watched my customers stitch everything from wedding gifts to heirloom samplers. This is everything I know about this topic -- from real experience, not theory.
")
Gridded white Aida cloth with water-soluble marker and embroidery hoop on crafting table
By Tracey Kramer • • 12 min read
Gridding your cross stitch fabric is the single most impactful prep step you can take before placing your first stitch. If you've ever miscounted a row and spent an entire evening frogging, you already know the frustration that gridding prevents. After 22 years of designing counted cross stitch patterns, I can tell you that a simple grid on your Aida cloth transforms stitching from a nerve-wracking guessing game into a relaxing, confidence-building experience.
What Is Gridding in Cross Stitch?
Gridding is the process of marking lines on your cross stitch fabric to create a visual grid that mirrors the 10x10 squares printed on your chart. Most counted cross stitch patterns use a standard 10-square grid overlay to help you navigate the design, and when you replicate that same grid directly on your Aida cloth, you create a built-in roadmap for every stitch you place.
Think of it this way: your charted design is essentially a map, and gridding gives your fabric coordinates. Instead of counting 47 squares from the edge to find your starting point, you simply count grid lines. Instead of recounting an entire row because something looks off, you glance at the nearest grid line and confirm your position in seconds.
Gridding is not the same as using pre-gridded Aida cloth, though the concept is similar. Pre-gridded fabric comes with grid lines already woven or printed in, which can save time. But many stitchers prefer to grid their own fabric because they can control line placement, color, and removal method. I've tried both approaches over the years, and I keep coming back to gridding by hand because it lets me customize the grid to the specific pattern I'm working on.
Why Gridding Changes Everything for Cross Stitchers
I get asked all the time whether gridding is really worth the upfront effort. My answer is always the same: yes, especially if you value your time and your sanity. The hour or two you spend gridding will save you many more hours of counting, recounting, and frogging mistakes.
The biggest benefit is accuracy. Miscounts are the number one frustration I hear about from stitchers, whether they're beginners working a first project or experienced crafters tackling a BAP. A grid catches errors early. When you're stitching inside a 10x10 block and your count doesn't match, you know immediately. You might only need to frog a handful of stitches instead of ripping out an entire section.
Gridding also speeds up your stitching. This surprises people, because adding a prep step seems like it should slow things down. But once your grid is in place, you spend far less time counting from reference points. Your eyes move from chart to fabric with confidence. Your rhythm improves. Your WIP sessions become more productive and more relaxing at the same time.
There's a mental health benefit too. Cross stitch is supposed to be calming and meditative. That calm disappears the moment you realize you've been stitching in the wrong spot for the last 30 minutes. Gridding removes that anxiety. You sit down, pick up your hoop, and stitch with the peace of mind that everything is exactly where it should be.

Tracey Recommends
Zenacolor 32 Fabric Markers Pens - Non Toxic, Indelible and Permanent Fabric Paint Pens - Fine Point Tip Textile Marker Pen
These are the markers I reach for every time I grid a new project. They draw clean lines on Aida cloth and wash out completely in cool water. Test on a scrap first, but I've never had a problem with quality brands.
Check Current Price →The hour or two you spend gridding will save you many more hours of counting, recounting, and frogging mistakes. Cross stitch should be your calm, creative space — if counting errors are stealing that calm, give gridding a try.
Gridding Methods: Which One Should You Use?
There are several ways to grid your fabric, and the right choice depends on your project, your fabric color, and your personal preferences. I'll walk you through the most popular methods so you can pick the one that fits your stitching style.
Water-soluble fabric markers are the most common gridding tool, and they're what I reach for most often. These markers lay down a thin line that washes out completely when you rinse your finished piece. You can find them in blue, which shows up well on white and light-colored Aida, and in white or light shades for darker fabrics. The key is to test your marker on a scrap of fabric first. Some brands disappear with a damp cloth, while others need a full soak. Either way, always avoid heat. Never iron over water-soluble ink before washing it out, or you risk setting the marks permanently.
Monofilament or fishing line is another popular option. You weave a thin strand of monofilament (find on Amazon) through the holes of your Aida cloth in a straight line every 10 squares. The advantage is that there's zero risk of staining your fabric, and you simply pull the line out as you stitch over each section. The downside is that monofilament can snag your floss if you're not careful, and it takes a bit longer to install than drawing lines with a marker.
Easy-count guideline thread is a product specifically designed for gridding. It's a thin, brightly colored thread that you weave through your fabric just like monofilament, but it's softer and less likely to catch on your DMC floss. It's become a favorite in the FlossTube community for good reason. It pulls out cleanly, shows up clearly, and doesn't interact with your stitching in any negative way.
Sulky Sliver or metallic thread can also work for gridding, particularly on dark fabrics where you need high visibility. It's a bit stiffer than guideline thread, but the metallic sheen makes it easy to see against black Aida cloth. Just be aware that any metallic thread can be a little grabby, so you'll want to pull it out section by section rather than trying to yank it all at once.
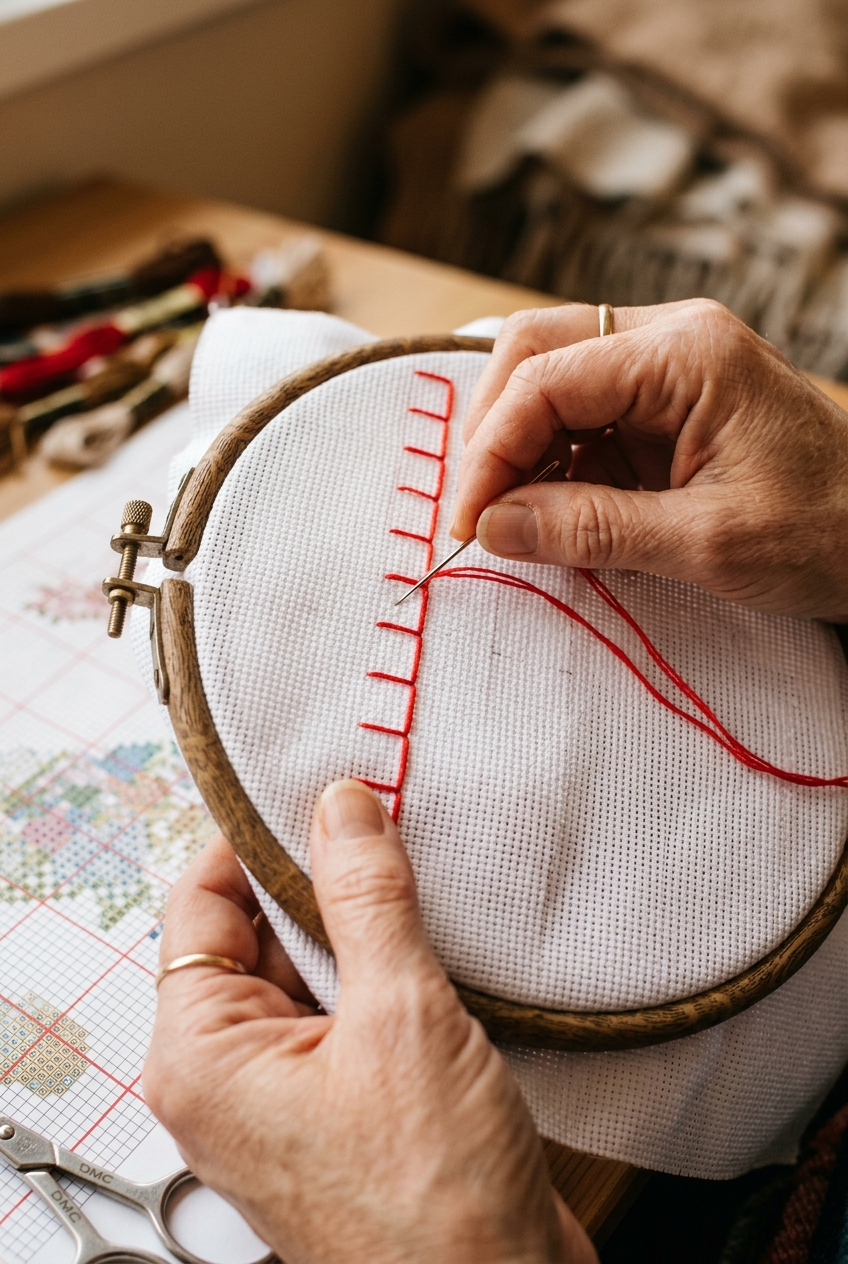
Hands weaving guideline thread through Aida cloth for cross stitch gridding technique
How to Grid Your Cross Stitch Fabric Step by Step
Let me walk you through the process I use. This method works whether you're gridding with a water-soluble pen or with guideline thread. The principle is the same: create a 10x10 grid that matches your chart.
Step 1: Find your fabric center. Fold your Aida cloth in half vertically, then in half horizontally. The point where the two folds meet is your center. Mark it with a small pin or a single stitch of contrasting thread. This center point should correspond to the center of your cross stitch chart. If you're unsure how to locate center on your chart, most patterns mark it with arrows along the edges.
Step 2: Prepare your fabric in a hoop. I always recommend working with your fabric in a wooden or plastic embroidery hoop (find on Amazon), 5 to 6 inches. The tension keeps the fabric taut and makes gridding lines straighter and easier to draw. If you don't want to hoop up for gridding, at least work on a hard, flat surface so the fabric doesn't bunch under your marker.
Step 3: Grid from the center outward. Starting at the center mark, count 10 holes in one direction and draw or weave your first gridding line. Then count another 10 holes and repeat. Work from center to one edge, then return to center and work toward the opposite edge. Do this for both horizontal and vertical lines. You'll end up with a grid of 10x10 blocks covering your entire stitching area.
Step 4: Extend the grid only as far as your design. You don't need to grid the entire piece of fabric. Check your pattern's stitch count and grid only the area that will contain stitches, plus a small margin. This saves time and keeps your margins clean for framing later.
Step 5: Double-check your grid against your chart. Before you stitch a single cross, count a few grid intersections and compare them to your chart. Make sure the total number of blocks matches. It's much easier to fix a gridding error now than to discover it 40 hours into your project.
|
Patterns from the Sunrays Collection Tracey's Picks, designing cross stitch patterns since 2004 |
|||||
|
|||||
| Browse the full Sunrays collection → |


Common Gridding Mistakes (and How to Avoid Them)
Even experienced stitchers make gridding mistakes, so don't feel bad if your first attempt isn't perfect. Here are the errors I see most often and how to sidestep them.
Using the wrong marker. Not all fabric pens are created equal. A standard Crayola marker or Sharpie will permanently stain your fabric. You need a pen specifically labeled as water-soluble or heat-erasable for fabric use. Water-soluble fabric markers designed for quilting and sewing work beautifully on Aida cloth. When in doubt, test on a scrap.
Gridding over the holes instead of between them. Your gridding lines should run between the fabric holes, not through them. If you draw through the holes, the ink can bleed into the thread channels and become harder to wash out. For woven guides like monofilament, you'll weave through every other hole, staying in a straight line along one row.
Skipping the center-out approach. Some stitchers try to grid from one corner, counting across the entire width. This increases the chance of cumulative counting errors. Starting from the center and working outward means any small miscount only affects a short section, and it's easy to catch and fix.
Forgetting to remove gridding before framing. If you're using water-soluble markers, you need to rinse your finished piece in cool water before any heat touches it. If you're using guideline thread or monofilament, pull it out as you complete each section so it doesn't get trapped under dense stitching. Planning your removal method before you start will save headaches at the finish line.
Gridding too tightly with thread. When weaving monofilament or guideline thread, keep the tension relaxed. If you pull it taut, it can distort the weave of your Aida cloth and make your stitches look uneven in that area. A gentle, slightly loose weave is all you need.
Get Stitching Tips & New Patterns from Tracey
Honest advice, new Sunrays designs, and occasional VIP-only offers. No fluff.
No spam. Unsubscribe any time.

Tracey Recommends
Crayola Construction Paper Bulk Pack (480 Sheets) 10 Assorted Colors, 9x12, Teacher School Supplies & Classroom Must Haves, Card Making Craft Supplies, Art Paper
If you prefer a no-ink approach, guideline thread is the way to go. It weaves through your Aida cloth, shows up clearly while you stitch, and pulls out without leaving a trace. A must-have for dark fabric projects.
Check Current Price →Do You Always Need to Grid?
Honestly? No. Gridding is a tool, not a rule. For small, simple designs with limited colors and a low stitch count, you might not need a grid at all. If you're stitching a small pattern on 18-count Aida with a design area under 50 stitches in any direction, counting from center may be all you need.
But for anything larger or more complex, I consider gridding essential. Large cross stitch projects with confetti stitching, detailed backgrounds, or subtle color transitions are exactly the scenarios where a grid earns its keep. When you're parking threads across a big section or working a design with dozens of similar DMC floss colors, the grid becomes your best friend.
I also strongly recommend gridding for any project where the fabric and floss colors are similar. Stitching cream-colored thread on light Aida, for example, makes it hard to see where you've already stitched. The grid lines serve as a secondary reference when your eyes are straining to distinguish fabric from thread.
If you've ever abandoned a WIP because the miscounts piled up and fixing them felt impossible, gridding might be the thing that turns your next project into an FFO. I've seen it happen countless times in the stitching community. Someone who swore they'd never grid tries it once on a big project and never goes back.
At the end of the day, gridding is about making the experience more enjoyable. Cross stitch should be your calm, creative space. If counting errors are stealing that calm, give gridding a try. The worst that happens is you spend an extra hour prepping. The best that happens is you fall in love with stitching all over again.
Gridding is one of those small steps that makes a massive difference in how much you enjoy your time with needle and floss. Whether you reach for a water-soluble marker or weave in guideline thread, you're giving yourself the gift of accuracy, speed, and peace of mind. If you're ready to put your new gridding skills to work, browse the full collection of counted cross stitch patterns at Sunrays Creations and pick a design that inspires you.
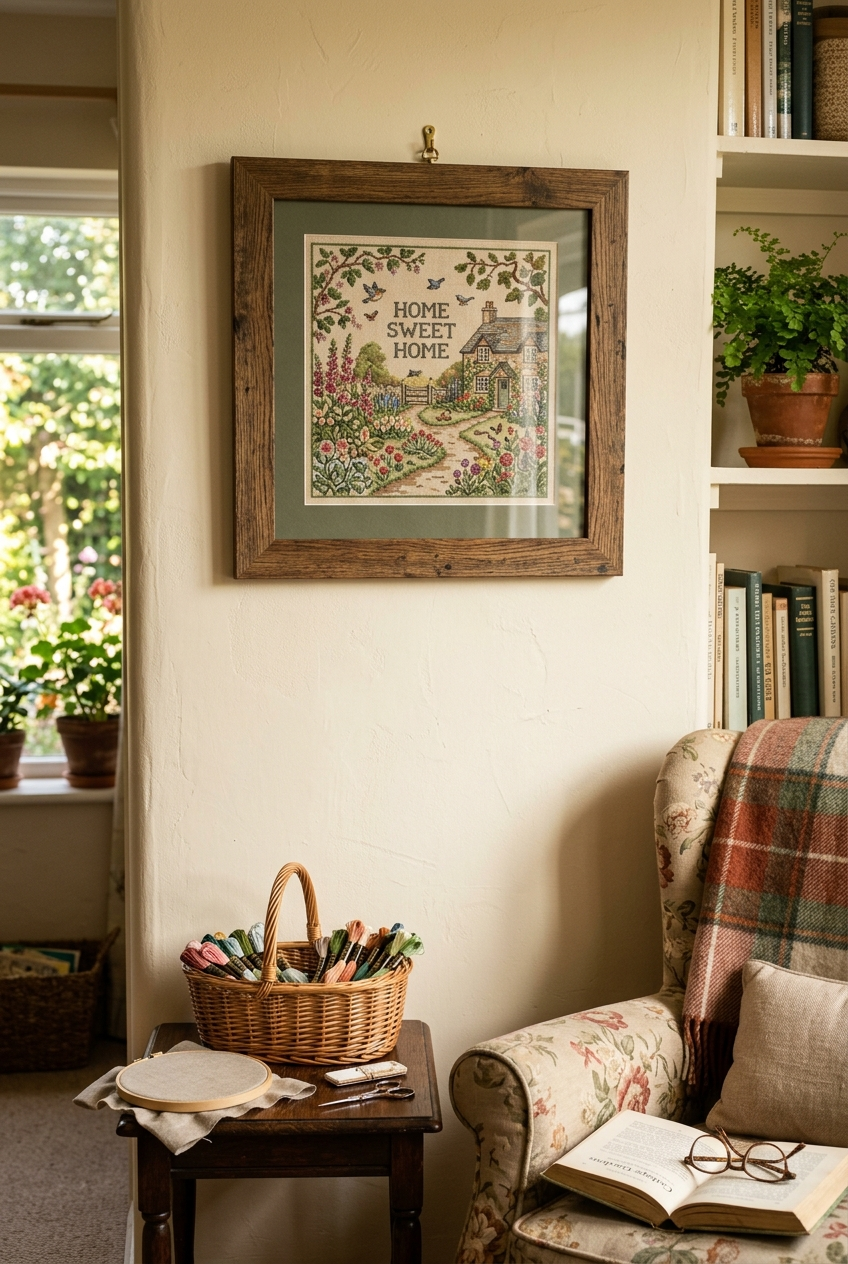
Framed finished cross stitch artwork on wall with cozy crafting supplies nearby
Keep Reading
How to Read a Cross Stitch Pattern: A Complete Guide for New Stitchers
Gridding only works if you understand how your chart is organized. This guide walks you through reading symbols, finding center, and navigating a counted cross stitch pattern from edge to edge.
Read the Pattern GuideHow to Prepare Cross Stitch Fabric Before You Stitch
Gridding is one step in a bigger fabric prep process. Learn how to cut, edge, and prepare your Aida cloth so it's ready for gridding and stitching.
See Fabric Prep StepsWhat Is Frogging in Cross Stitch? (And How to Do It Without Losing Your Mind)
Gridding dramatically reduces frogging, but when you do need to rip stitches, this guide shows you how to do it without damaging your fabric or your sanity.
Learn About FroggingFrequently Asked Questions
What is the best way to grid cross stitch fabric?
The most popular method is using a water-soluble fabric marker to draw lines every 10 squares, starting from the center of your Aida cloth and working outward. You can also weave easy-count guideline thread or monofilament through the fabric holes. I prefer water-soluble markers for light fabric and guideline thread for dark fabric.
Can I use a regular pen or marker to grid my Aida cloth?
No. Standard pens, Sharpies, and regular markers will permanently stain your fabric. Always use a pen specifically labeled as water-soluble or heat-erasable for fabric. Test any new marker on a scrap of Aida before using it on your project.
Do I have to grid my fabric for every cross stitch project?
Not necessarily. Small, simple designs with low stitch counts may not need a grid. But for larger patterns, projects with confetti stitching, or designs where fabric and floss colors are similar, gridding is a huge help. The bigger and more complex the pattern, the more valuable your grid becomes.
How do I remove gridding lines from finished cross stitch?
If you used water-soluble markers, rinse your finished piece in cool water before applying any heat or ironing. The marks will dissolve completely. If you used guideline thread or monofilament, pull it out section by section as you complete each area, or carefully remove it all when the project is done.
Should I grid from the center or from a corner?
Always grid from the center outward. Starting from a corner increases the risk of cumulative counting errors across a long distance. Working from center means any small miscount only affects a short section and is easy to catch and fix early.
What gridding method works best on black Aida cloth?
Guideline thread or metallic thread like Sulky Sliver works well on black Aida because the bright or metallic color is easy to see against the dark fabric. White water-soluble markers also exist, but thread-based methods tend to be more visible and reliable on very dark fabric.
Does gridding slow down the stitching process?
Gridding adds an hour or two of prep time, but it actually speeds up your overall stitching. You spend far less time counting and recounting, and you catch miscounts early before they snowball. Most stitchers who try gridding find their WIP sessions become faster and more relaxing.
What is the difference between gridding and pre-gridded Aida cloth?
Pre-gridded Aida comes with grid lines already woven or printed into the fabric. Gridding by hand means you add your own grid lines using markers or thread. Hand-gridding gives you control over line placement and lets you customize the grid to your specific pattern.
-- Tracey Kramer
Founder & Designer, Sunrays Creations Needlearts
Hand-charted designs since 2004 • Marysville, Ohio